
AWC Electronics - Physical Computing with Linux
PCs tend to be abstract things. You manipulate images on the screen -- and some of the modern games make those images look very real -- but in the end, those items usually don't have any life outside of your screen. But what if your computer could interact with the real world? That's the premise behind physical computing. Giving your PC a way to sense and control the real world opens up a whole new realm of possibilities ranging from new kinds of applications to traditional embedded systems like robotics.
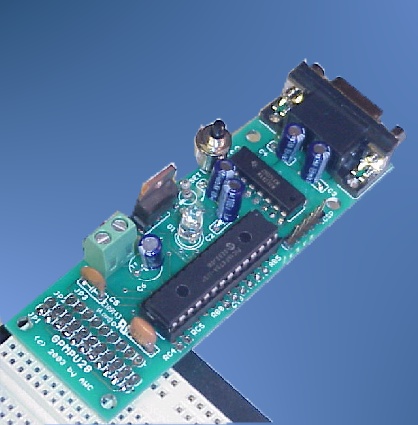
The AWC GP3 board gives your PC an easy way to read digital and analog quantities. It also allows your PC to send digital and analog signals to control the outside world. The GP3 connects to your PC using a serial port (which can be a USB serial port). The board comes with libraries and examples for a variety of development environments including Windows, Java, and Linux.
There's (at least) three ways to use the GP3 under Linux:
- Link the Linux object library with your program.
- Use the Linux shared library.
- Use the Gambas component (provided with this article) and write your program using Gambas.
About Gambas
You may not have heard of Gambas. The easiest way to describe it is Visual Basic for Linux with some Java thrown in for good measure (mostly internally). Visual Basic is much maligned, but it is good for rapidly creating GUI-based programs. Besides, while Gambas is somewhat like Visual Basic, it is -- in many ways -- better. For this project I used the stable version 2.7.1 of Gambas. Your Linux distribution may have a version it its package repositories. However, some packages are older than others. I found this repository with suitable deb packages (add http://azores.linex.org/gambas-other/ to your apt sources, or just download the deb directly and install it with dpkg). Of course, you can also install from the files from SourceForge.
Gambas has plenty of interesting features. Borrowing the list from the Gambas site:
- About 250 keywords and native functions to manage almost everything: arithmetic, strings, input-outputs, files, time...
- Full error management.
- Full process control, with pseudo-terminal management.
- Full support for watching input-output file descriptors.
- Event loop support with timers.
- Native UTF-8 string support.
- Full internationalization and translation support.
- Ability to call external functions in system shared libraries.
- Objects and classes.
- Properties, methods, constants and events.
- Public and private symbols.
- Polymorphism, i.e. virtual method dispatching.
- Single inheritance.
- Constructors and destructors.
- Array accessors, enumerators, sortable objects.
The Gambas Component
There are two ways you can use the GP3 with Gambas. Gambas has a means to call external functions in a shared library, and I did write a Gambas module to "wrap" the shared library API. However, I noticed that Gambas has a serial I/O component (in the gb.net component library) so I decided to try creating a component that directly talked to the GP3. The resulting component appears in the Gambas toolbox and you can drop it on a form like you would any other non-visual component (like a timer, for example). However, you can also just create the component directly in your code. For example:
PRIVATE board AS gp3
board=NEW gp3
A Sample Project
Armed with the component, it is trivial to create Gambas programs that interact with the real-world environment. To demonstrate, I created a small program that does two things. First, it blinks the GP3's onboard LED (the equivalent of "Hello World" in the physical computing world). Second, it uses an inexpensive PIR motion sensor to unlock your computer's screen saver when it detects motion. It turns out reliably unlocking the screen saver was the hardest part of the program!
The motion sensor is from Parallax (part number 555-28027) and is also available at many Radio Shack stores (part number 276-0033).
The sensor uses two infrared sensors to notice small differences in heat that occur when you (or something warm) moves in front of it. The device has 3 pins that are clearly marked as +, -, and out. Connecting the device is very simple. The power (5V) from the GP3 and the GP3's ground pin go to the sensor's + and - pins, respectively. The out pin goes to one of the GP3's digital inputs. It doesn't really matter which one you use, but I used pin 6.
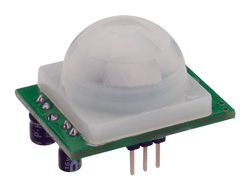
The PIR Sensor is about US$10
The Program
It was easy to layout the main form using the Gambas editor (which, I understand, is actually written in Gambas). The project requires several components to be selected -- in addition to the "usual" classes, you need the gb.desktop, gb.net, gb.settings, and gp3 components. The desktop component allows you to control the screen saver (well, sort of; you'll read more about that later). The net component contains the serial port interface which the gp3 component uses. The only purpose for the settings component is to save the program's settings when you close it so that it will reload them when you reopen the program.
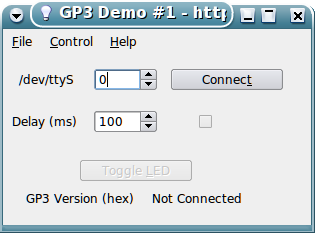
The GUI uses a toggle button for the connection button and includes a simple menu (right click the form to bring up the Gambas menu editor). A check box is used to show the state of the sensor input when the program is connected to the GP3 (sort of a software LED). The timer and GP3 components (from the Virtual tab in the toolbox) appear on the form at design time but do not show up on the program when it is running.
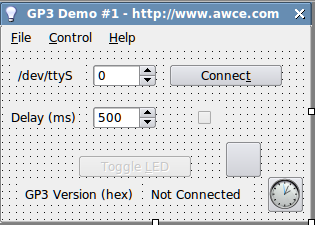
The main screen layout. The empty square near the timer (clock) is the GP3 component.
When you connect to the board, the timer executes a small block of code at the specified interval. The code blinks the LED, checks the sensor, and wakes the screen saver up if the sensor is active. Here's the code for the timer:
PUBLIC SUB Timer1_Timer()
 DIM pir AS Boolean
 IF IsNull(board) THEN RETURN
 togled_Click()
 pir = board.pininput(6) <> 0
  LED1.Value = pir
  IF pir THEN ResetSS()
END

' Toggle the onboard LED so we know something is happening
PUBLIC SUB togled_Click()
  IF n = 0 THEN
    n = 1
  ELSE
    n = 0
  ENDIF
    board.SetLED(n)
END
Note that communicating with the board is as simple as using the pininput and SetLED methods. A simple call to Connect opens communications with the board when you click the connect button.
You can find the rest of the code in the attached zip file. The screen saver unlocking is probably the most complex part of the program. Gambas has a mechanism (in the gb.desktop component) that should allow you to unlock the screensaver. However, it uses an external program that does not work with KDE 4 (which I happen to use). Using dbus-send to unlock the screensaver seems a little heavyweight, so that code is commented out. The actual method used is to ask the Gambas desktop component to send a shift key periodically which will keep the screen saver from activating or dismiss it if it is running.
Gambas can produce an executable and will even package your program for most popular distributions! Of course, your package will depend on the Gambas run time package which must also be available.s
Conclusion
The GP3 makes physical computing simple and inexpensive. Gambas is an excellent rapid development tool with many modern features (object oriented features, component architecture, and built-in debugging). Together, you can easily and rapidly build embedded Linux applications. You can download a zip file containing the GP3 component, the demo program, and the (unused) module that calls the GP3 .so file (this is purely for showing how to work with the .so; you don't need it if you are using the Gambas component).
Site contents © 1997-2018 by AWC, Houston TX (281) 334-4341